The Secret to a Professional Finish: The String Line
The difference between a “DIY-looking” fence and a professional-grade installation isn’t the lumber—it’s the layout. In the uneven terrain and heavy clay of the DFW Metroplex, a fence that looks straight from the back porch can often look like a roller coaster from the street.
To build a fence that is perfectly straight and square to your property, you must master the art of the String Line. This guide walks you through the “Pro Secrets” for laying out your perimeter before you ever touch a post-hole digger.
1. The Tools You’ll Need
Before you start, gather these specialized layout tools:
- Mason’s Line: Use a high-visibility (pink or orange) braided nylon string. Do not use kite string or twine; they stretch and sag.
- Batter Boards: These are simple “L-shaped” stakes made from scrap wood. They allow you to move your string slightly without pulling the stake out of the ground.
- Line Level: A small level that clips directly onto your string.
- Plumb Bob: To ensure your string line is centered exactly over your property pins.
- Marking Paint: White inverted spray paint to mark your post locations.
2. Establishing Your “True Line”
Your layout must begin at your Property Pins. These are the legal anchors for your build.
- Locate the Corners: Find the iron pins at the corners of your lot.
- Set the Batter Boards: Instead of tying the string directly to the pin, set a batter board about 2 feet behind the pin. This gives you room to dig the corner hole without losing your line.
- Pull it Tight: Stretch the mason’s line between the batter boards. It must be “guitar-string tight.” A sagging line leads to a bowing fence.
3. Squaring the Corners (The 3-4-5 Rule)
If your fence is meant to meet your house at a 90° angle, you cannot “eyeball” it. Professionals use the Pythagorean Theorem (the 3-4-5 rule) to ensure a perfect square.
- Step A: Measure 3 feet from the corner along one string and make a mark.
- Step B: Measure 4 feet from the corner along the perpendicular string and make a mark.
- Step C: Measure the diagonal distance between your two marks.
- The Goal: If the diagonal is exactly 5 feet, your corner is a perfect 90°. If not, adjust the string on the batter board until it is.
4. Marking Your Post Holes
Once the string is tight and square, it’s time to mark your post intervals. In North Texas, post spacing is critical for wind resistance.
- Standard Spacing: For a 6-foot fence, posts are usually spaced 8 feet on center.
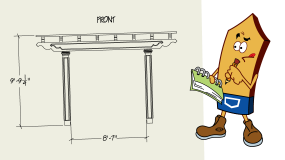
- Wind-Resistance Spacing: For an 8-foot fence, we recommend 6 feet to 7 feet to handle the higher wind load of the North Texas prairie.
- The “Clearance” Rule: Set your string line about 1 inch to 2 inches away from where the actual post will be. If the post touches the string, it will push the string out, and every subsequent post will be crooked.
- Marking: Drop a plumb bob from the string to the ground and spray a white “X” for every hole.
5. Managing Slopes and Hills
North Texas isn’t flat. If your yard slopes (common in Rockwall and Murphy), you have two choices for your layout:
- Level Top: The top of the fence stays level, but the bottom is “stepped” to follow the ground.
- Racked: The entire fence follows the contour of the land.
Pro-Tip: Use your Line Level to determine exactly how much your yard drops from one end to the other. If the drop is more than 12 inches over 50 feet, a “stepped” design usually looks more professional.
Why Layout Matters for Materials
An accurate layout prevents “The Picket Gap.” If you guess your measurements, you may end up with a 4-inch gap at the end of a run that requires a custom-cut picket. A precision layout allows you to order exactly the right amount of #1 Grade Western Red Cedar with zero waste.
Ready to Start Digging?
Once your string is set and your “X”s are marked, you are ready for the most labor-intensive part of the build: the foundation.