Fence Supply Inc

Fence Supply Inc. - Wood, Iron, Chain-Link, PVC, Farm & Ranch Fencing, Iron Handrails, Posts, and Gates, PVC Handrails, Posts, and Gates; Gate Operators; Access Control; Kennels

(972) 226-0004

Contact     Hours     Map
  • My account
  • Cart
  • Wood
  • Iron
  • Vinyl
  • Chain Link
  • Gate Openers
  • Farm & Ranch
  • Shade Structures
  • Hardware & Tools

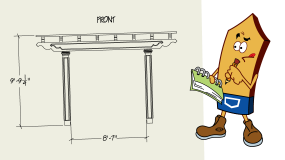
How to Stain a Wood Fence Arbor or Pergola

admin · November 26, 2012 ·

Pergola_in_Cloisters_Pocket_Park_-_geograph.org.uk_-_823464

Pergola by Ruth Thomas via Wikimedia Commons

An arbor or pergola is a common feature found in many gardens.  These consist of wooden fences and arcs where vines are allowed to creep and grow. A fully-vined arbor or pergola forming into a long, stretched tunnel will offer welcome shade and privacy.

In order to protect your wooden arbor or pergola, you should stain the wood, not paint it. This will highlight the natural beauty of the wood.  We recommend Baker’s Gray-Away products to stain your wood, using the following steps as guide:

Curing, cleaning, and preparation

New wood needs to cure, or weather, before stain is added. There are four different wood conditions that require specific cleaning, curing, and preparation before staining is done: new and untreated, new and pressure-treated, old and withered, and previously-stained wood.

The recommended weathering period for new and untreated wood is 4 to 6 weeks, while for new and pressure-treated wood, a period of 1 year is needed. Old and withered or previously-stained wood don’t need any curing since they have already been subjected to plenty of weathering.

You can clean new or old unstained wood by using either a percarbonate wood cleaner or sodium hydroxide, with cleaning pressure not exceeding 1500 psi. If you don’t have either of these cleaning agents, you may use a water and household bleach mixture at a ratio of 1:2. Make sure you wear the right protective clothing, because some of these chemicals are hazardous.

For previously-stained wood, you need to strip previous stains and sealers by using a wood stripper. Make sure you test whatever stripper you use on a small, unobtrusive section of your wood before cleaning it, to prevent discoloration and damage of your fence.

After cleaning, you must prepare your wood for staining by restoring its pH. Use acidic wood brightener for this purpose on any wood condition. The table below will serve as a useful guide for determining the curing, cleaning, and preparation requirement for your wood condition.

Wood Condition

Weathering Period

Cleaning Agent

Cleaning Pressure

pH Balancer

New, untreated

4-6 weeks

Percarbonate or Sodium Hydroxide

1500 psi max

Acidic Brightener

Pressure-treated

1 year

Percarbonate or Sodium Hydroxide

1500 psi max

Acidic Brightener

Old, withered

NA

Percarbonate or Sodium Hydroxide

1500 psi max

Acidic Brightener

Previously-stained

NA

Sodium Hydroxide Wood Stripper

NA

Acidic Brightener

Properly mix stain and sealer products

Before applying the stain and sealer on wood, make sure that you properly mix it before using. Proper mixing will ensure that the stain and sealer will give maximum protection to your wood products and ensure good coloration.

Wood coating

Always apply 2 coats to the wood for the best results.  You may use sprayer, brush, or rollers when applying wood stain. Apply a heavily-saturated first coat on the wood and allow the stain to penetrate until only a few or no wet areas are visible.  Then apply a lighter second coat. Make sure that the second coating covers the entire surface of the wood. Then leave the wood untouched, allowing it to dry for 48 hours.

Keep the following in mind when staining and sealing your wood:

  1. When using a sprayer, make sure that the pressure does not exceed 1500 psi.
  2. When using a brush or roller, always work with the grain of the wood.
  3. Don’t allow long periods of time between coats. An average of 15 to 30 minutes and a maximum of 1 hour is the recommended time interval. Make sure you keep this in mind, especially if you’re using a brush or rollers, because these take longer to cover everything.
  4. For less absorbent wood (e.g. cedar), you need to wipe off excess stain after allowing the second coat to seep into the wood for 15 minutes.
  5. Don’t leave puddles, since they will reduce the quality of the coating.  Coat out these puddles using a brush.

After you’ve followed these steps, sit back and wait for your vines to cover your arbor/pergola, and enjoy the beauty it gives your property.

Wood apply wood stain, cleaning agent, pressure treated wood, sodium hydroxide, stain, staining a wood fence, staining dyes, staining wood, treated wood, wood brightener, wood coating, wood fences, wood preservation, wood stain, wood staining, wood strippers

Wood Privacy Fence Post Spacing & Post Selection Guide

admin · November 26, 2012 ·

Fence Post Wood Choice and Spacing Guide for Privacy Fence


Things you will need

The primary materials you will need in your privacy wood fence are the wooden post, the horizontal wood railings, and the wood fence panels.  The number of these materials will vary depending on the length of the fence.


Choosing the right type and measurement of wood for these materials are essential for your fence.  The right type of wood to be used depends on your preferences.  For information regarding this, please refer to the article “A Choice Between Cedar and Economy Wood Fence”.  For the dimensions use the following instructions:


  1. For wood panels, you may choose to use wooden boards or pickets.  The advisable height for wood panels is 6 to 10 feet, the thickness should be around 1 to 2 inch, and the width should be 4 to 6 inch.  The advisable dimension is 1 inch by 4 inch by 6 feet.


  1. Wood posts are the ones to carry the most of the fence weight so they should be larger than the panels and the railings.  You should choose post materials with a 4 inch width and 4 inch thickness, giving you square wooden board for you post.  The height will be equal the height of your fence plus 2 to 3 feet.  The extra length is allowance for the ground hole where the post will be buried.


  1. Wood fence railings should be 6 to 8 feet in height with 1 to 2 inch thickness and 4 to 6 inch width.  The advisable dimension is 2 inch by 4 inch by 8 feet.


Aside from these wood materials, you will also need the following:

  1. Hole digger or shovel;
  2. Wood saw;
  3. Hammer or nail gun;
  4. Carpentry level;
  5. Metal tape measure;
  6. Stakes or marker;
  7. String; and
  8. Nails.


Bury your wood posts

The first thing you should do is to measure the perimeter of your fence and determine the amount of post that you will install.  Bury a wooden stake at each corner of the fence and set the strings in these stakes for proper lining.  Bury a wooden stake in between corners where you need to put a wooden post.  Start digging on the spots where the wooden stakes are place.  Make sure that the hole is at least 2 feet in the ground.  Bury the wood post and make sure that they are standing straight by using the carpentry level before covering the hole.  Use concrete to cover the post holes for increased stability.


Fix wood railings

The first railing should be close to the ground with a distance of around 1 to 3 inches.  The next railing should be placed about 3 to 5 feet above the first one and so on.  Fix the fence on the wood post using nails after making sure that they are properly leveled.  Make sure that the end of each rail is placed at the center of the wooden post aside from the end posts.  This is to ensure proper connection between railings.  Cut wood railings to reduce length when necessary.


Fix wood panels

The last step in your fence installation is to fix the wood panels.  Place the first panel at the end post.  Then make sure that it is properly leveled and fix it on the railings using nails.  Place the next panel beside the first and fix it to the railings using nails.  Do the same for the succeeding panels until the entire fence is covered.  Cedar and other wood types that are resistant to contraction due to heat can be placed next to each other.  For other types of wood that are prone to significant contractions, sufficient space should be provided in between panels.


After installation, you may stain or paint your fence depending on your preference but least assured, you can now have the elusive privacy that you deserve.

Wood construction, fence panels, fence post spacing, fence post wood, fence railing, privacy wood fences, wood fence panels, wood fences, wood panel, wood privacy fence, wood railings

How to Line up Wood Fence Post

admin · November 26, 2012 ·

Fence posts are one of the most important parts of your wood fence when it comes to withstanding the stresses of time and nature. They bear the burden of holding the wood fence against the wind and whatever else nature throws at it. Installing your posts correctly so they are sturdy will help your fence last longer.

Wood post installations are not only a dig-and-fill kind of job. You need time, attention, and patience. Make sure you go through the following steps for your fence.

Establishing the area within you property line

The first thing you should do is determine the perimeter of your fence. Get a map of your property from your local government, showing your property line. It’s also a good idea to check with the government if you need any permits to build your fence. Use the map to plot out the perimeter of your fence on, or just inside of, your property line.

Setting and measuring the wood fence perimeter

Using the lot plan as reference, set your fence lines and mark them by using wooden stakes and string.  Be sure that the fence line doesn’t go over the area of your property.  Then measure each fence line and jot it down to use for planning the number of fence posts.

Determining the number of fence posts

The number of wood fence post depends on the measurement of each fence line, the type of your fence, and the kind of wood panels you’ve decided on.

Wood fence posts may be lined up 6 to 8 feet apart depending on the type of your fence. For privacy fences where the wood panels are placed next to each other, 6 feet is more appropriate in order to have enough post strength to carry the weight of your wood panels.

The type of wood in your fencing panels also plays a big part in the proper spacing of your fence. The heavier the wood variety, the smaller the distance between your posts should be.  This is again for the purpose of having enough support for the weight of your fence.

When you have decided on the proper spacing between your fence posts you may then figure out how many fence posts you’ll need. Just figure out how many you need for each side of the property line, then add them all up. For any sides where you’ll have a gate, note that you should have two lines, one on each side of the gate (don’t forget to include the gate post!).

Corner posts should be buried deeper to the ground (at least 2/3 of the entire length of the post) compared to your line posts (at least 2 feet). Considering this, your corner posts should be longer and if possible larger than your line posts.  The following formula will help you compute the number of fence posts you need. The gate posts should be larger and longer as well.

Lining up wood posts

There are two ways to choose on how to line up your wood posts. The first is to start from a corner post and line up each post equal to the distance you have decided in between posts.  In this method, you may have the last post with a different distance to the corner post compared to the spacing of the others.  This is the more economical way of lining up fence posts.

The next method is to space your posts equally.  This will give you better weight distribution but might be more costly compared to the first method since you may need to cut your wood railings if the spacing is a nonstandard length.

Mark the points where your posts will be buried using wooden stakes. After this, you can now proceed to the installation of your posts and the entire fence.

Wood agricultural fencing, barbed wire, fence, fence post, lot plan, outdoor recreation, sturdy wood, wood fence post, wood fences, wood panel, wood post, wood varieties

Picket Estimation Formulas

admin · November 26, 2012 ·

It is important that you properly plan before constructing your fence; you don’t want to run out of materials halfway through your install. To properly estimate the number of pickets needed in your fence, you have to determine the following important factors regarding your fence:

Fence perimeter

Fence perimeter is the total length your fence will run. If the area that you need to enclose is a rectangle, the perimeter is the total length of all four sides. In order to get this measurement, all you need to do is measure along the fence lines until you arrive where you  started. Jot down this information for later use.

Gate length

This should only be considered if you will use different materials for your gate or you will use wood but you will space the pickets differently than that of the fence line spacing. If so, you need to have a separate estimate of the number of pickets needed on your gate, which is fairly easy to estimate, and add it to the number of pickets needed for your fence line. But don’t forget to subtract the gates from the length of the fence you measured!

Privacy fencing or not

The kind of fence also has a significant effect on the number of pickets you need. For privacy (instead of decorative) fences, the pickets are tightly spaced so people will not be able to see into your yard through your fence. Privacy fences will obviously require a greater number of pickets than other fence types. The type of fence you will put up will require different formulas to be used on your estimate.

Side by side or overlapping

After deciding the type of fence you will install you will then have to decide whether you want to install them side by side or overlapping. Overlapping picket fence requires more materials than the side by side type.

Privacy fence picket estimation

If you have decided to erect a privacy fence, the table below will help in calculating the number of pickets needed for the entire perimeter:

Picket Multiplier Table for Privacy Fencing (per foot of fence perimeter)

Picket Dimension

Multiplier

Side by Side

Overlap/

Board on Board

1 x 4 (3½”)

3.3

4.4

1 x 4   Full 4”

3

4

1 x 6  (5½”)

2.2

2.9

1 x 6 Full 6”

2

2.45

To estimate the total number of fence pickets, use this formula:

[(Fence Perimter – Gate Length) x Multipler] +Number of Pickets per Gate

Regular fence picket estimation

There will be no multiplier table for regular type fences since it is up to you how far from each other you will install the pickets.  Below is the formula to help you with this computation:

[(Fence Perimeter – Gate Length) ÷ (Picket Width + Distance Between Pickets)] + Number of Pickets per Gate

These formulas will help you estimate the number of pickets you’ll need for your entire fence. And now you are one step closer to having the fence you’ve always dreamed of.

Wood

How to Pick the Perfect Wood Fence

admin · November 26, 2012 ·

Are you scratching your head  over the many options and styles available for a new wood fence? Don’t worry, Fence Supply Inc. is here to help. We are just a phone call away and we will be happy to help you through this process. All we need is your measurements for your fence project to help you estimate what and how many materials you need. See our article Measuring For My Fence Project. This information is very important to give you an accurate estimate for materials.

Choosing a great Wooden Privacy Fence can be a very straightforward process. In fact, the process should begin with a simple question of how long you would like the wooden fence to last. The cost of a new wooden fence is important, but this should not be the deciding factor. Longevity and functionality is a much better fence decision maker.

Your first step is to pick one of the four types or species of wood.

Wood type or species

Traditional

Cedar

Cedar

Treated Pine

Spruce/Pine

Longevity

20 – 25 Years

20 – 25 Years

15-17 Years

9 – 12 Years

Grade Options

Clear, #1, #2

#2 BTR

#2

Premium

Thickness

21/32”

21/32”

23/32”

5/8”

Environmental friendliness

10+

10+

10

10

Cedar Fence Options

Western Red Cedar has natural durability and exceptional beauty that bring warmth, character and longevity to your fence project. Western Red Cedar is great for both residential and commercial projects. Whether you choose a #1 grade, with small, tight knots, or the Cadillac of cedar grades, clear, Western Red Cedar offers virtually unlimited versatility and design flexibility.

Western Red Cedar is a truly sustainable fencing material. It has the lowest environmental impact when compared with other fence materials such as brick and stone. Go Green with Cedar.

Western Red Cedar is one of the world’s most durable woods. Natural resistance to moisture, decay and insect damage has long made Western Red Cedar the premier choice for either privacy or decorative fence projects. Fibers in cedar heartwood contain natural preservatives that are toxic to decay-causing fungi.

Western Red Cedar Fence Alternatives

Fence Supply Inc strives to help customers stretch their fence dollars as far as possible. We offer some great alternatives to western red cedar that last almost as long. Currently we offer two such products: Everwood and Aromatic Cedar. These are cousins of western red cedar and offer almost the same longevity and durability, at less of a cost.

Note: most companies will sell you these products and call them western red cedar. Fence Supply Inc. will not do this. We always want our customer to understand the product they are receiving. Come in and check out these two varieties yourself to see the difference.

If you are offered a “cedar product” from another company, and the price seems too good to be true, it probably is. Ask lots of questions, and come in to Fence Supply Inc., where you will be sure to get honest answers.

Treated Pine Wood Fencing

Treated pine is a great product as an alternative to Western Red Cedar. It is more cost effective than cedar and has a good, long lifespan.

All of our treated pine is treated with MicroPro® technology, a revolutionary way to pressure treat wood for decks, fences, landscaping and general construction uses. MicroPro® pressure treated wood is treated with micronized copper preservatives, which help protect against termite damage and fungal decay. MicroPro® offers many benefits including significantly improved corrosion performance. MicroPro®-treated wood products are U.S. building code compliant.

Osmose MicroPro® technology is the first treated wood process to be certified under Scientific Certification Systems Environmentally Preferable Product (EPP) program based on Life-Cycle Assessment.

Read more on how this treatment is revolutionary: Information About MicroPro® Micronized Copper Treated Wood http://www.treatedwoodtruth.com/Treated-Wood-Information-on-Osmose-MicroPro-Lumber.php

A comprehensive review of copper-based wood preservatives can be found at http://www.treatedwoodtruth.com/pdf/Nov08-FPJ-Feature.pdf

Spruce Wood Fencing (commonly referred to as SPF)

Spruce is a great, economic privacy fence option.  Fence Supply Inc. has a few different options when spruce fencing is the fence of choice.  Spruce fencing accepts stain very well to extend the life of the fence and give a nice rich look.

Spruce-pine-fir

SPF refers to spruce-pine-fir, Canadian woods of similar characteristics that have been grouped for production and marketing. Four species, White Spruce (Picea glauca), Engelmann Spruce (Piceaengelmanni), Lodge pole Pine (Pinus contorta), and Alpine Fir (Abieslaciocarpa) comprise the SPF species group. All yield high-grade timber with relatively small, sound tight knots.

SPF lumber is seasoned uniformly in dry kilns to a moisture content of 19% or less. Kiln drying inhibits natural staining of the wood, improves its strength and stiffness, enhances its appearance and increases its resistance to decay and attack by insects.
SPF has a high strength-to-weight ratio and is well known for its outstanding working properties. It takes and holds nails exceptionally well and is easily worked with hand and power tools.

Wood cedar fence, construction, deck, fence, fence alternatives, fence options, fence project, fence supply inc., fir, lumber, privacy fence, spruce-pine-fir, structural engineering, visual arts, wood fences, wood preservation, wood processing, wooden fences, wooden privacy fence

How Long Should a Wood Fence Last

admin · November 26, 2012 ·

When you’re planning on installing a new wood fence, make sure you think about how long it’s going to last. This mainly has to do with how long the wood that you’ve chosen is going to last, and how soon or long it’s going to be before the wood needs to be replaced.

Natural life of wood

The first thing you should know in estimating the life of your fence is the natural life of your wood. The most commonly used wood types for fences are cedar, spruce, and pine. Depending on the species, cedar may last for about 15-30 years, spruce may last for about 4-7 years, and pine may last for about 5-12 years.

Life of treated wood

Most treatment companies claim that when treated, most lumber will last more than 20 years. This holds true for pine and spruce, while cedar may last up to 40 years. Whatever money you spend on buying treated wood, you will more than make up for it in the long run.

Installation considerations

The biggest culprit when it comes to premature aging of fences is moisture. Be sure none of your fence panels or pickets touch the ground, where it will be in regular contact with a lot of moisture. But what about your posts? A fence is only as strong as its weakest link, and ground that is high in moisture reduces the life of a post by up to 3 years. Make sure your posts are stained or treated before you install them, and make sure you provide a concrete or gravel filler for your post holes to keep out moisture.

Maintenance

To get the maximum life out of your fence, you must regularly maintain it. Not maintaining a fence will take years off of its life. Make sure you stain and paint your fence, and reapply the stain every 2 years, or the paint every 4 years.

Now after you have considered all the factors listed above, take a look at the charts below to see how much proper installation and maintenance will make on your fence. The table below will show you how long your wood fence should last.

Cedar


Untreated

Treated

Timber life (years)

15 – 30

25 – 40

Is your fence properly installed?

Yes

+0

No

-3

Yes

+0

No

-3

Is your fence properly maintained?

Yes +2

No

-2

Yes

+0

No

+0

Yes +2

No

-2

Yes

+0

No

+0

Minimum estimated life (years)

17

13

12

12

27

23

22

22

Maximum estimated life (years)

32

28

27

27

42

38

37

37

Spruce


Untreated

Treated

Timber life (years)

4 – 7

20

Is your fence properly installed?

Yes

+0

No

-3

Yes

+0

No

-3

Is your fence properly maintained?

Yes +2

No

-2

Yes

+0

No

+0

Yes +2

No

-2

Yes

+0

No

+0

Minimum estimated life (years)

6

2

1

1

22

18

17

17

Maximum estimated life (years)

9

5

4

4

22

18

17

17

Pine


Untreated

Treated

Timber life (years)

5 – 12

20

Is your fence properly installed?

Yes

+0

No

-3

Yes

+0

No

-3

Is your fence properly maintained?

Yes +2

No

-2

Yes

+0

No

+0

Yes +2

No

-2

Yes

+0

No

+0

Minimum estimated life (years)

7

3

2

2

22

18

17

17

Maximum estimated life (years)

14

10

9

9

22

18

17

17


Wood construction, fence, install a wood fence, lumber, treated wood, wood, wood aging, wood fences, wood preservation, wood products

Wood Fence Components Illustration

admin · November 19, 2012 ·

Fence Components

Pickets

Pickets are available in a variety of widths and finishes; the most common is the 1” x 4” and the 1″ x 6”.  Some of the available pickets are full-cut and others are a nominal.  This can be very confusing if we don’t speak the same language.  Fence Supply Inc. will always tell you if it is a 1″ x 6″ or 1″ x 5 ½” for the actual width.

Pickets are available with different shaped tops. Flat top, Dog Ear, Gothic point and Virginia or French Gothic are available from Fence Supply Inc.

Brackets

Fence Supply Inc. offers two styles of brackets for installing your fence on metal post:  a one piece bracket and a two piece bracket. Both of these brackets use 4 lag screws per bracket. High quality ¼” x 1 ½” lag screws should be used.

Rails

Fence rails attach to the post with brackets, or in the case of a wood post, are nailed directly to the post.  This is a very important component for a successful fence installation. The most common size for rails is 2” x 3” or 2” x 4”. Maximum post spacing is 8’ between posts; thus, a 2″ x 4″ x 8′ rail would be used. If you are doing an 8’ tall fence, we recommend using a 2″ x 4″ x 12′ rail and setting your posts on 6’ centers.

Posts

This is the foundation of the fence. If you’re on a tight budget this is not the area to try to save money. Invest in the best foundation you can afford. When you figure for your fence posts, remember depth and distance apart vs.fence height. All posts should be installed using our Sakrete product, which is available in 80 lb. bags for ease of loading and use. When building a 6′ high fence, you should set your posts at a depth of 2′ at a distance of 8′ on center (O/C). When building an 8′ high fence, you should set your posts at a depth of 2′ at a distance of 6′ O/C. (See gate section for gate post depths and measurements). Fence Supply Inc. recommends a minimum of 2-3/8″ posts for building wood fences.

Kick-board

Kick-boards are installed at the base of your fence. This is an excellent way to protect the bottom of your fence and/or add height to your fence as needed. Fence Supply Inc. recommends using 2″ x 6″ treated pine for your kick-board needs, although other sizes and types of wood are available. These 2″ x 6″ boards may be “stacked” to give more height as needed where there are low areas that need the extra height. Treated pine holds up well in all types of weather and maintains its integrity throughout its life. Fence Supply Inc. has the 2″ x 6″ treated pine available in 8′, 12′ and 16′ lengths.

Cap board

Installation of the cap board will add the finishing touch to your new fence. A cap board adds beauty to any wood fence and will set your fence apart from the others. When installing a cap board, ensure that your posts and the top of your upper rail are the same height as the top of your fence. This will give you the width and support necessary when attaching the cap board. Most cap boards will be either a 2″ x 6″ or a 2″ x 8″ and can be either cedar or treated pine, depending on your fence type.

Trim board

Trim boards are the crown molding for your new fence. The ultimate in beauty is the double step trim. There are several installation types to choose from; 1″ x 4″ x 8′ is the most common use of trim board; however, a 1″ x 2″ may also be used either as a single trim board or in combination with the 1″ x 4″ trim board to give a stair-step look to the trim. You should choose a trim board wood species that matches your fence type.

Screws vs. Nails

With today’s technological advancements in coatings, the choice of using screw vs. nails may be strictly a personal choice based on tools available or ease of installation. Either is an excellent choice and today’s coatings will give years of beauty without bleeding. Fence Supply Inc. recommends the Duo Fast coil or strip nails to be used in conjunction with the Duo Fast coil or strip nail guns which can help in decreasing your installation time. Battery-powered drills with Phillips bits may be used with our coated screws for a faster installation as well. Fence Supply Inc. carries all these products as well as galvanized hand nails for those wishing to install their fence in this manner. (See tool rental for tools available.)

Fence Gate Hardware

Wood gate hardware is offered to complement your new fence. Powder-coated black hardware is made for years of use. For walk gates we recommend using 3 hinges for both 6’ and 8’ tall fences.

Types of Wood Fence Styles

Side by Side – Traditional picket fences are sometimes referred to as a stockade fence.  Pickets are placed side by side butted up next to each other. One misunderstanding is that space needs to be left between pickets. This is not true; the pickets when placed in this fashion will shrink and should be placed tight to maximize privacy.

Board on Board – This is a full privacy fence; you have two rows of pickets with the rear pickets spaced to allow a one inch overlap when the top board is installed. This style fence will give you maximum privacy.

Shadow Box – Pickets are placed behind and in front of each on opposite sides of the rails, creating an almost full privacy effect, but allows for air flow with this spacing.

Decorative Picket Fence – A traditional picket fence, commonly with 4’ tall by 8’ wide sections. The pickets will have a decorative point or top cut into the top edge of the picket. This fence is commonly used as a property board or decorative fence used in conjunction with a privacy fence.

Basket Weave – This a unique style of fencing consists of post and pickets only.  The pickets are normally 1″ x 6″ x 16′ cedar or redwood and installed horizontally in a basket weave pattern.

Split Rail Fencing – Split rail is most commonly offered in a 2-rail and 3-rail option.  This is a great farm & ranch, garden board, or accent fence. The hand-split style of components has a tremendous curb appeal to this style of fencing

Wood building wood fence, fence components, fence height, fence rail, fence supply inc., picket fence, picket fences, types of wood fences, wood fence styles, wood fences

How to Build a Wood Gate

admin · November 19, 2012 ·

Unlike other gates, which you can only install after finishing your fence lines, wood gates can be installed right along with your wood fence. The following steps will guide you in installing your wood gate together with your wood fence. Using these steps will help you have a continuous workflow and save you some time.

How to Build a Wood Gate

Set posts

While installing your wood posts, make sure you mark where the gate opening will be. Your gate posts will have a different distance compared to that of other fence posts. The typical gate opening is 36 inches.  Add to this a 1 1/2 inch (3/4 inch each) combined gap for gate hinges and the gate latch, and you will have a total distance of 37 1/2 inch between your gate posts.  This measurement is intended for self-closing hinges. There is no need to provide a gap for hinge installation if you will be using the regular hinge types.

How to Build a Wood Gate

Attach rails

After securing your fence posts, fix your fence rails onto them. Do not cut the rails at hinge post and latch post. These rails will serve as the primary frame for your wood gate.

How to Build a Wood Gate

Insert diagonal braces

To add stability and strength to your wood gate, insert diagonal braces on the railings in between your latch and hinge posts. Place these braces leaving a 4-inch clearance to the posts.  This clearance will serve as space for the latch and hinge installations.

How to Build a Wood Gate

Cut rails on gate hinge side

When cutting the rails on the hinge side, be sure to cut the rail only halfway through if you will be using a regular hinge. If you’re using self-closing hinges, cut the rails on the hinge side but be sure to provide support for your gate weight and the force of fixing the fence pickets.


How to Build a Wood Gate


Nail pickets in place

In fixing the nail pickets allow a 3/4 inch gap on latch side. On the hinge side also allow a 3/4 inch gap if you will be using self-closing hinges. No allowance is needed on the hinge side if you will be using regular hinge types.

How to Build a Wood Gate

Install hinges

Install hinges along the railings of the fence.  Installing a hinge on the top, middle, and bottom rail is advisable for regular hinge types.  For stronger hinge types, top and bottom hinges may be sufficient.  For regular hinge types, cut the center back of rails on hinge side after installation.

How to Build a Wood Gate

Cut rails on latch side and install gate latch

Cut the rails on latch side and install the latch. Make sure that proper support is provided to the gate while installing the latch.  Ensure appropriate latch installation by using reliable installation guides.

How to Build a Wood Gate


How to Build a Wood Gate

Insert gate stopper

To prevent the gate from opening more than the desired angle and causing unwanted damage on the hinges and the gate, insert a 2 inch by 4 inch gate stopper or “Back Stop” with a setback of 1/2 inch from the pickets.

Test

After the installation, test your wood gate to determine performance. For those using self-closing hinges, adjust closing force as desired. Make any adjustments needed until desired gate performance is achieved.

Wood building a wood gate, fence supply, fence supply inc., gate hinges, gates, hinge, latch, supplies, wood gates

How to Estimate Material for a Wood Privacy Fence

admin · November 16, 2012 ·

Wood Privacy Fence Material Estimation

Cost is one of the major considerations in the installation of a privacy fence, but it seems like there is no set price for a wood fence. This is because of the variety of factors that make each fencing project unique: area of the country, size of the fence, materials used, etc. This is why it’s important to estimate your fencing material needs as accurately as possible, so you can budget accordingly. This guide will help.

Determining the number of fence posts

The number of wood fence posts depends on the measurements of each fence line, the type of fence you’re building, and the kind of wood you’re using.

Wood fence posts should be lined up 6 to 8 feet apart depending on the type of your fence. For privacy fences where the pickets are placed next to each other, 6-foot spacing is more appropriate in order to have enough post strength to carry the weight of your pickets.

The type of wood you use also plays a big part in the proper spacing of your fence. The heavier the wood, the smaller the distance between your wood posts should be.

When you have decided on the proper spacing between your fence posts, you may then compute for the number of fence posts. The first you should determine is the number of your line posts, using the following formula:

No. of line posts per fence line = (Length of fence line / Spacing between posts) – 1

Do this for each fence line and add to get the total number of fence posts needed.  For the side where the gate is situated, you will have two lines.  Measure each line from the gate post to the corner.

Corner posts should be buried deeper into the ground (at least 2/3 of the entire length of the post) compared to your line posts (at least 2 feet). Considering this, your fence posts should be longer and if possible larger than your line posts. The following formula will help you compute the number of fence posts you need.

No. of corner posts = Total number of corners + 2

The total number of corners pertains to the number of corners in you fence perimeter. If your perimeter is square or rectangular, your fence will have 4 corners. Add 2 and you will have 6 corner posts. The 2 additions will be used as gate posts.

Determining the number of wood railings

It is advisable to have three parallel railings (one each at the bottom, middle, and top of the fence) in order to properly support the weight of the pickets. The computation of the number of wood railings on your fence will basically depend on the number of posts computed as follows:

No. of wood railings = (No. of line post + No. of corner posts – 1) x 3


Determining the number of pickets

For privacy fences pickets need to be placed next to each other so as not to have gaps.  The combined width of your pickets should be equal to the total perimeter of the fence less the gate length.  Use the following formula in computing the total pickets needed:

No. of pickets = (Total fence perimeter – Gate length) / Width of each picket

These are the main materials that are needed in your fence.  In computing for the total cost, don’t forget to add 2 or 3 items per category as buffer for waste materials. If your supplier computes prices using board feet, you can compute it as follows:

Total board feet** = (length * width * thickness) / 144

**All units should be in inches.

After getting the cost for the main materials, add 40% of the amount for labor cost, and 20% for other materials such as nails, cement, etc. You should also make a separate estimate for staining or painting, and consider cost of permits and cost of renting tools needed if applicable.

With a little bit of careful planning at the beginning, you can be sure to come on budget when you build your new wood fence!

Wood fence material, fence products, fence wood, privacy fence, privacy fence material, privacy fence wood, wood fence post, wood fence product, wood privacy fence

Chainlink Gate

admin · November 15, 2012 ·

GALVANIZED
GATES
Bent
Frame
Residential,
1 3/8″ bent frame, economy walk and
drive gates. Stocking heights 4,5,and 6. Custom sizes available.
Residential
Residential,
1 3/8″ frame, welded walk and drive gates.
Available from 36″-96″ heights.
Industrial
Swing Gates
1
5/8″ and 2″ frame welded walk and
drive gates. Used in commercial and industrial
projects. Available from 36 ” to 144″
heights.
Commercial
Cantilever Gates
Commercial
and Industrial specialty gates.
Commercial
Barrier Gates
Used
for parking and vehicular control. Gates constructed
with 2″ pipe.Gates are in single panels; you will need
to order 2 panels for drive gates.
COLOR
POLY COATED GATES
Color
Coated Residential Gates
Residential,
1 3/8 Inch frame, welded walk and drive gates.
Available from 36″-96″ heights.
Color
Coated Industrial Swing Gates
1
5/8″ & 2″ frame welded walk
and drive gates.Use two (2) swing gates to make a double drive
gate.

Used in commercial and industrial projects.

Available from 48″ to 144 ” heights.

Chain-Link

Power for Your Electric Fence

admin · November 5, 2012 ·

The significant work you have done in installing your fence would be wasted if you don’t use the right charger to give power to your wires.

Imagine having a 10 mile fence The work you have done to install this should have cost you a significant amount of money, time and effort. The one weakness in all your planning and hard work was the type of charger you picked. You were eager to release your animals and proud of the work you did when suddenly your animals showed you that there are parts of your fence with almost no power on the wires. Your face would be red as you tried to corral your animals back in, scratching your head as to what went wrong.

At the onset of the planning phase, you should consider which charger would be suited for your electric fence.  In deciding on the appropriate charger, you should consider the following factors:

  • What power source you will use;
  • What kind of animals will you be keeping within the enclosure;
  •  How long is your fence and your electric wires;
  • What type of electric fence wire; and
  • Other factors.

AC vs. DC vs. Solar

What power source you will use will affect which type of charger you will need.  There are three types of chargers based on the power source they use: AC, DC, and the solar chargers.

AC chargers run on alternating current and are plugged directly into an outlet.  These types of chargers are most recommended if you have access to a reliable power source. It is also recommended for maintaining a high electric charge, which is advisable for the enclosure of larger and more aggressive animals.

Chargers running on AC can generate more power compared to other sources, and the higher voltage they generate makes them advisable for long-distance transmission.  AC types of current can also be easily stepped up or down by using transformers, making it possible to adjust the current in you electric fence. It can even be easily converted to DC current.

DC chargers are battery operated. The main advantage of these types of chargers is the smooth flow of the current they produce. Since wires are less resistant to DC, it takes lower voltage to run this type of current and it produces less heat on the wires compared to AC. DC chargers are also not subject to reactance. This lowers the possibility of losing power on some parts of your fence.

Solar chargers are chargers which basically run on DC-type current.  These are the most economical types when maintaining farms on remote areas far from power lines. These types of chargers convert sunlight into electricity and store them in batteries.  When fully charged, these types of charger can maintain power for up to two weeks.

The following matrix would give you a larger view of the difference between these types of chargers:

AC Chargers

DC Chargers

Solar Chargers

Power

Strong Average Average

Distance charged

Can carry current to long distances due to its higher power output. Can carry current to a reasonable distance. Can carry current to a reasonable distance.

Current conversion

Can easily be converted to DC type of current Much more difficult and costly to convert to AC Much more difficult and costly to convert to AC

Output conversion

Output can easily be increased or reduced using transformers Power supply must match the load Power supply must match the load

Effect to electric wires

Shortens life of electric wires due to heat it produces as a result of resistance and reactance Prolongs life of electric wires due to lesser heat it produces Prolongs life of electric wires due to lesser heat it produces

Cost

More costly Economical Economical

Efficiency

Less efficient due to wire resistance of the wires to this type of current and impedance it causes More efficient to use More efficient to use

Location

Advisable for any location with a reliable power source More advisable for remote areas More advisable for remote areas with more exposure to sunlight

Animals for enclosure

Advisable for enclosure of larger and more aggressive animals.  Also advisable for herd types. Advisable for more sensitive animals which requires lesser enclosure area. Advisable for more sensitive animals which requires lesser enclosure area.

Use this matrix in order to properly identify the type of electric fence charger that will be most suitable for your needs.  Being prudent in choosing these chargers saves a lot of time, money, and effort.

Electric Fence

Troubleshooting Electric Fences

admin · November 5, 2012 ·

Helpful guides to diagnose defects in your electric fence.

Maintaining your electric fence could be costly if you call an electrician each time you have a problem. For example, sometimes problems like having low or no charge could be caused from faulty wiring or a damaged charger, requiring professional help. Or, it may be something as simple as a blown fuse or a wrong setting. So here is a guide to use before calling your electrician. Hopefully you’ll be able to save some money.

An electric fence system is composed of the fence charger, the ground wire, the ground system, the lead out wire, lightning diverter (optional) and the fence wire. If you know these parts well, you’ll have a leg up in troubleshooting your own system. We recommend researching exactly how your particular brand of electric fence works and fits together.

There are two main problems that may occur on your electric fence system: either there is no power on your fence wires, or the power is too low to be an effective deterrent.

If the there is no power on your electric fence, you should consider the following causes:

  • No power from main source
  • Charger not plugged in
  • Blown fuse
  • Dead batteries
  • Corroded terminals
  • Defective charger
  • Faulty lightning diverters
  • Line break
  • Short circuits
  • Improper/inadequate grounding

Possible reasons for having low power are similar. Examples includE:

  • Low voltage from main source
  • Corroded fuses
  • Low-charged batteries
  • Corroded terminals
  • Defective charger
  • Faulty lightning diverters
  • Short circuits
  • Improper/inadequate grounding

To pinpoint the actual cause of the problem, you should use the elimination method in checking your electric fence system.  Here’s how to do it:

(Note: you probably don’t need to be told, but you’re working with electricity here, which could be dangerous or fatal if you don’t take the proper precautions! If you feel out of your depth, don’t try to do this yourself; call an electrician. Be sure that you only have power running through your systems when you need it. If it’s not neccesary, turn off the power at the breaker box to prevent shocks.)

Step 1:  Check the main power source and electric chargers

For AC chargers you should check whether your chargers are plugged into the main power source. If they are, check the main power source for lack of power or low voltage output.

For DC and solar chargers, check the charger batteries. Make sure they are properly charged. As you do so, check the output terminals for corrosion. Do the same of the input terminals of your electric charger.

If no defects are found, check your electric chargers. Use a tester to measure its power output. Check output terminals for corrosion.

If no defects are found, proceed to the next step.

Step 2:  Check lead out wire

You should disconnect the lead out wire from the main system. Do the same with the ground system. Turn off the power before you do so. Once isolated, turn the power back on and check the lead out wire for voltage output.

If no defects are found, connect the ground system.

Step 3:  Check ground system

Once the ground system is connected, check the voltage. If it’s defective, check the ground system. This may be caused by a wet ground where ground rods are buried, improper spacing of the ground rods, or underground water system or other underground utilities that are affecting the ground system.  Further familiarization with the grounding system is recommended to properly carry out this job.

If no defects are found, connect the lightning diverter.

Step 4:  Check lightning diverter

After connecting the lightning diverter to the lead out wire, check for voltage output.

If no defects found, connect the fence wires.

Step 5:  Check fence wires

If you are maintaining multiple levels of wire fence, you should test each level for power charge. In doing this, always disconnect all other wire levels not being tested to isolate the cause.  Once you have found which wire level or levels are faulty, it’s time to make your rounds of the fence.

You should check for the following while making your way around you fence:

  • Tree branches touching the wires;
  • Weeds touching the wire;
  • Damaged insulators;
  • Line breaks; and
  • Short circuits.

You may check for short circuits by using an AM radio.  Short circuits cause interference in radio signal.  Once interference occurs, you will know that you are near the part of the fence with a short and it would be easy to locate the damage.

In doing the entire troubleshooting process, don’t forget to always check for corrosion on the wires or any parts of the circuitry.  Repair or replace the damaged part of the electric fence system if you think you are capable of doing so.  If not, seek the help of an expert.

Protect yourself while doing the troubleshooting by using insulated gloves and being careful in each step.  A defective electric fence can always be repaired; injuries or fatalities due to electric shock might not be so easy.

Electric Fence

Faultless Grounding System

admin · November 5, 2012 ·

Electric systems need to be grounded in order to prevent electric shocks. A grounding system carries electric current away and leads it into the ground, where it is absorbed. It’s important that your electric fence is properly grounded to protect yourself and your loved ones.

In an electric fence, grounding is a vital element since the wires are exposed and can easily be subjected to short circuit or human contact.  To prevent accidents, you should know how to install proper grounding before starting the installation of your fence. Soil conditions, charger capacity, and the composition of the grounding materials are the most basic considerations in proper grounding.

Soil conditions:

Dry soil or soil with low moisture content is more difficult when it comes to grounding. Dry soil needs to have longer grounding rods in order to be correctly grounded. High moisture soil is a grounding-friendly type of soil. Moisture will help the grounding rods dispose of the fault current from the circuit, since wet soil conducts electricity better. The presence of minerals and organic matter in the soil also improves the grounding capability of the buried rods.

Charger capacity:

Charger capacity and required grounding are directly proportional. The higher the capacity of your electric charger, the more grounding you will need. Be sure you know the power of your charger, and the required length of your ground wire.

Grounding materials:

Knowing a bit about the types of metal available for use as grounding rods will help you decide which ones to use for your fence:

  1. Aluminum rods – will easily corrode in the soil. Not recommended for use as grounding rod.
  2. Galvanized steel rods – last for long periods but tend to lose conductance once they corrode. Can be used as grounding rods.
  3. Copper rods or copper clad steel rods – last for longer periods and never lose conductance, even if they corrode. These are most recommended for use as grounding rods.

In the installation of your grounding system, you should use a 600 volt to 20 kilovolt insulated ground wire. The first ground rod should be placed within 20 feet of the charger.  For best results, use 6 ft to 8 ft rods driven into the ground, with a distance of 10 ft between each rod.

Use at least 3 ground rods for your electrical fence. If 3 rods would not provide proper grounding, use additional ground rods until the desired effect is achieved. These rods should be placed a reasonable distance away from drinking areas for your animals. You should also make sure that the ground rods are away from any underground utility lines, as this would disrupt signals of telephone lines or any electric utilities. Use grounding clamps in connecting the rods to the ground wire as these will not easily corrode when paired with the appropriate ground rod.

Grounding is an important part of the electric fence system that you are installing, so you should allot a considerable amount of time and effort to it. Once you have done these and made a faultless ground, you have already solved 90% of the connection problems that may happen to your electric fence.

Electric Fence

Electric Fence enclosures for Man’s Best Friend

admin · November 5, 2012 ·

If you own a dog, you may have considered trying to keep your dog in your yard, where it’s safe, or keep undesirable critters out, with an electric fence. You might be surprised to know that there are electric fencing options for your pets. These options are safe, humane, and people-friendly, and when installed properly, will train your pet in no time that digging or climbing is not allowed.

For better planning of your yard perimeter electric fence, the first thing you should do is know your own dog and its behavior. The following are the qualities of your pets that are relevant to the installation of your electric fence:

  1. Jumping capacity – knowing how high your dog could jump will help you determine the height of your fence. The higher their capacity to jump, the higher your fence should be.
  2. Athletic composition – If your dogs are bigger and more muscular, you’ll need a multi-level, multi-wire fence. But for less brawny, “jumpier” dogs, less levels will suffice.
  3. Hair type – the type of fur your dogs have will determine which type of electric fence charger is appropriate to use. The more fur, the more voltage you need.
  4. IQ – believe it or not, your dog’s IQ may help you in planning your electric fence.  Bright dogs would easily grasp the perimeter of your electric fence through exposure to it while less intelligent dogs may need constant reminders that there is an electric wire that would prevent them from getting out of your yard.  For intelligent ones, you may opt to use steel or aluminum wire.  For the not-so-smart ones, it’s better to use tape to make the fence more visible to them.

Another thing that you should consider in installing your yard perimeter fence is the vegetation around your premises.  You should make sure that there are no shrubs, weeds, ornamental plants, or other vegetation in contact with you electric fence. These would drain energy from your fence.

Yard perimeter electric fences are similar and at the same time different than other electric fence types (e.g. fences for cows, horses, and other livestock). The similarity is that you are installing the same type of fence, and you will need the same components.  Fence chargers, fence wires, grounding systems, fence posts – all of these are still the same vital parts for you yard perimeter electric fence.

There are a few differences and they are as follows:

  1. Wire levels – to fence in your pets, you may need a greater or lesser number of wire levels of depending  on the type of dogs you own.  The spacing of your wire levels is also smaller than those for livestock fences.  Ideal wire level spacing for dog fences ranges from 4 inches to 12 inches.
  2. Lowest fence level – for dog fences, you need your lowest fence levels to be nearer to the ground.  This is to prevent your dogs from escaping by digging the ground below the fence.
  3. Accessories – you may need more accessories for your dog fences.  These fences may have a low electric current — not enough to do too much harm — but they will certainly cause annoyance to anyone who come in contact with them. Having adequate warning devices around your fence will ensure everyone stays safe and happy.

Electric Fence

Solid State vs. Low Impedance Chargers

admin · November 5, 2012 ·

As you’re researching the best components to use for your electric fence, you may have been confused by the difference between solid state and low impedance chargers. And since the charger is by far the heart of the electric fence, you need to make sure you’ve chosen the best option for your needs.

The basic differences between these two charger types are as follows:

Shock force

Low impedance chargers can a deliver high amperage shock, which makes these types of chargers the best choice for bigger livestock, such as cattle or horses.

Solid state chargers on the other hand deliver a smaller-amperage shock. This type of charger is most suited for smaller animals. You would want to pair your solid state chargers with bare wires made of steel or aluminum. The smaller resistance in these wires will help increase the effectiveness of the charger’s shock force.

Power perks

Low impedance chargers increase power output if given additional load, while solid state chargers do not. This makes low impedance chargers more suited for heavy weed conditions and longer fences. This type of charger is also recommended in handling animals with a lot of fur.

Solid state chargers do not have this quality, which makes the more suitable for low-to-moderate weed conditions, average fence length, and animals with less fur. When using these types of charger, you should make sure that your fence perimeter is clear of weeds. Weeds will ground your electric fence and cause additional load, which will cause a shortage of power on your fence. Solid state chargers do not pack additional energy to cover these loads.

Having understood these two basic differences, you’re ready to choose the right type of charger to use on your electric fence. You may wonder why are there low impedance chargers being offered for your electric fence while you haven’t seen any high impedance chargers. Are high impedance chargers the same as solid state?

The answer is no. High impedance chargers pack stronger shock forces and have more power perks that low impedance chargers. These qualities make these types of chargers have a high tendency of burning weed, which runs the risk of starting fires.

Electric Fence

Electric Fencing for your cattle

admin · November 5, 2012 ·

Cattle raising may be geared towards dairy or meat production or its combination.  Many cattle raisers may think that if they have chosen the right breed and gave them the right food, then their animals will give them the optimum production that they desire.  For them, these two factors are the main contributory aspects for cattle raising and they tend to consider other aspects as insignificant such as providing adequate fence for their cattle farm.  If this is also how you think, then you are taking the wrong path in cattle raising whether for dairy or for meat production.

It is true that choosing the proper breed and providing adequate food will greatly enhance your production but there is another factor that you should consider.  That is – providing the right living conditions for your animals.

Exposing your cows to a stressful environment will significantly decrease their dairy production.  Too much stress would even cause a cow to stop producing milk.  It will also affect the quality of their beef due to the constant strain in their muscles caused by stress.  It will take away the moisture and would toughen their beef.

Installing an electric fence would prevent your cattle from straying and would also help provide the ideal environment for your livestock by warding away external disturbances such as stray animals from other farms.  Knowing which type of electric fence to install will lead you one step closer to your goal of having optimum production.


Which kind of electric fence is best for cattle?

For cattle enclosures, the bare type wires are most recommended particularly the steel wires.  This type of wire carries higher charge and would serve both purposes for installing your fence which is to keep your cattle in and to keep other animals out.  Installing high tensile fence would enhance current flow and would improve the overall quality of your fence.

The height of your fence should be at least 4’ and the spacing between fence posts should be about 6’ to 10’.  Use wooden posts for corners and wood or fiberglass as line posts.  Don’t use metal posts since these would dampen the flow of current.

In choosing the correct fence charger, make sure that it can carry power throughout the mileage of your fence.  It would be a grave mistake to leave other parts of the fence poorly charged due to lack of power.  Your fence is only as strong as its weakest parts.


Introduce your animals to the fence.

Training your cattle to the effects of the fence would condition them to stay away and would prevent too much stress.  The cattle herd training would require repetition.  You should let them graze near the fence while maintain a low charge so they could grasp the effect of the fence.  You could increase the charge every training session until such time that your animals would develop an instinct to maintain a considerable distance from the electric fence.

In order to achieve your goal of earning high returns, you should invest money and time for every dime you want to earn.  Installing an electric fence and considering these simple steps would help ensure that your cattle have an ideal environment to live in until such time that they are fit for harvest.  This is a simple milestone to your ultimate goal.

Electric Fence

How To Install Chain Link Fence

admin · November 2, 2012 ·

BEFORE YOU BEGIN


Before You Begin:

  1. Obtain necessary zoning and building permits.  There may be local zoning or deed restrictions, or HOA rules pertaining to height and type of fence permitted in your area.
  2. Find surveyors pins if the fence is to be located near property lines or have the lot surveyed.
  3. Measure your fence footage and determine gate placement.
  4. Check with your local utility company to make sure that there are not any underground lines that might be disturbed.


HELPFUL TOOLS


String

Tape Measure

Post Hole Digger

Level

Come -A-long

Fence Finger (Stretcher)

Fence Pliers

Hog or Pig Ring Pliers

5/16th Socket to Tighten Bolts

Wheelbarrow, Shovel to Mix and Transport concrete


Picket Man’s Chainlink Fence Shopping Supply List


LINE POST (Intermediate Post) See Line Spacing Chart  
TENSION BAND For each end post, use 3 for 31 Vh’ and 4′ 4 each for 5′ and 6.’Same for gate posts.

Double the quantity for corner posts.

 
BRACE BAND 1 for each rail end  
 5/16″ x 1V»” CARRIAGE BOLT 1 for each brace band1 for each tension band  
POST CAP 1 for each terminal post  
EYE-TOP 1 for each line post  
TOP RAIL, plain or swedged end Same lineal footage as fence fabric  
RAIL-END 1 for each end post1 for each gate post

2 for each corner post

 
TOP RAIL SLEEVE 1 for each length of plain end top rail.Not needed for swedged end top rail  
TENSION BAR 1 for each end post1 for each gate post

2 for each corner post

 
FENCE FABRIC Same linear footage  
TIE WIRES 1 for every 24″ of top rail and1 for every 12″ of line posts  
DOUBLE DRIVE GATE As required  
SINGLE WALK GATE As required  
POST HINGE (Male Hinge) 2 for single walk gate4 for double drive gate  
3/8″ x 3″ CARRIAGE BOLT 1 for each post hinge  
GATE HINGE {Female Hinge) 2 for single walk gate4 for double drive gate  
3/8″  x 1  3/4″ CARRIAGE BOLT 1 for each frame hinge  
 FORK LATCH 1 for each walk gate  


STEP 1


SETTING YOUR TERMINAL POSTS


1.   Your property line will help determine the location of the corner,      gate and end posts.

2.  Dig your post holes using an auger or hand digger. The depth of your post holes will be determined by your local soil and weather conditions.  ( In the North Texas area, the terminal post hole should be 6-8″ in diameter and a minimum of 24″ deep.  )

3.  Set all terminal posts in concrete.

4.  Use a level to insure posts are plumb on all sides.

5. See fig. ? to determine the height  ground to top


STEP 2


SETTING YOUR GATE POSTS

1.  Gates come in many standard widths:  39″ – 48″ – 60″ – 72″  Single and Double Drive.

2.  Fence Supply Inc is your one stop shop for all your gate needs!

3.  The gates make the adjustments to account for the latch and hinges.

4.  When setting your gate post measure the inside to inside of the each post.

Example:  If you want a 4′ gate, set the post 4′ apart – Measuring from the inside of one post to the inside of the other post.


STEP 3


SETTING YOUR LINE POSTS

1.  Pull a taut string line on the outside of the terminal posts measuring the distance between terminal posts

2.  Mark ground for line posts-anywhere between 8′ – 10′ apart along the string line.

3.  Dig your hole 6-8″ wide with a minimum depth of 18″.

4.  Before concrete sets, adjust post height by carefully moving post up or down in footing.  See “Height to set Post Chart” for precise measurements.


STEP 4


ADDING FITTINGS TO TERMINAL POSTS

(Refer to parts list for quantities needed)


IMPORTANT NOTE:  Concrete footings must be hardened before proceeding to fittings


1.  Slip single tension bands (STB) -with the long flat surface facing towards the outside or wire side of fence – onto the terminal post.

2.  Add brace bands if using rail ends.

3.  Place cap on top of post


STEP 5


ADDING TOP RAIL


1.  Place line top cap on each line post.  Offset should face outside of post.

2.  Thread length of top rail pipe through the line-tops on the line posts adjacent to terminal post.

3.  Attach top rail to terminal post using a RT cap OR rail end and single brace band (SBB).

4.  Using a band bolt, attach the single brace band to rail end securing it around the terminal post.

5.  Continue by attaching the swedge ends of top rail together until desired length has been reached.

6.  If top rail IS NOT swedged, join top rail lengths using a top rail sleeve.

7.  Cut last piece of rail to fit tightly against terminal post.  Secure rail using a rail end and brace band or RT cap as was done on prior terminal posts.


STEP 6


HANGING FENCE FABRIC


1.  Starting at a terminal post, unroll chain link fabric on the ground along the outside of the fence line to next post.


IMPORTANT NOTE: If linear footage between terminal posts is greater than 50ft (standard roll length of chain link fabric) splicing sections of fence fabric will be necessary. 

                               See Figure 8 for splicing illustrations.


2.  Slide tension bar through the first row of chain link.

3.  Fasten evenly spaced tension bands already on post (see step 4) to the tension bar and fabric.

4.  Secure in place with a 5/16″ x 1 1/4″ band bolt with heads facing the outside of the fence.

5.  Walk along the fence fabric, standing it up against fence frame, eliminating slack as you go.

6.  Loosely attach fabric to top rail with tie wires to hold it in place.

7.  Separate enough fabric from roll to span the opening between fence posts.

8.  It is not necessary to cut wire.  (See Figure 8 for Removing Excess Fence Fabric)


STEP 7


STRETCHING FENCE FABRIC


1.    Insert a tension bar approximately 3′ inside the unattached end of the fence fabric.  (See Figure 9)

2.   Hook fence finger to the bar.

3.   Attach a “come-a-long” from the finger to the other terminal post.

4.   Stretch fabric until tight, using the come-a-long.

5.   A slight slack should be created when squeezing diamonds formed by the wire with your hands.  Diamonds should not look distorted or overly stretched.

6.   Insert tension bar at exact length needed to attach to terminal post.

7.   Attach single tension bands from terminal post to tension bar using band bolts.

8.   Once bands are securely attached to bar, carefully remove stretching bar/finger and come-a-long.

9.   Fasten fabric securely to top rail and line post using tie wires spaced 24″ apart long the top rail and 12″ apart on each line post. (See Figure 10)

10. Securely tightegn nuts on all single brace and single tension bands.


STEP 8


HANGING GATES


IMPORTANT NOTE:  Same installation procedure is used on both single walk and double drive gates (See Figure 11)


1.  Install pin (male) hinges to gate post.

2.  To prevent gate from being lifted off, top pin hinge should be installed with pin pointing down; bottom pin hinge with pin pointing up.

3.  Install gate clamps (female) to gate.

4.  Insert pin hinges into gate clamps – adjusting as needed to align top of gate with top of fence.

5.  Add gate latch and position at convenient height.

6.  Tighten all bolts securely.


Privacy?

Privacy is possible with chainlink.  Slats can be added to add design, color and privacy.  Contact Fence Supply Inc. or visit our web site www.fencesupplyinc.com to see our wide varity of Chainlink slats.


Commercial Chainlink Fence.


Commercial Applications can be installed the same as residential with a few exceptions.

  1. The post tyipically are larger in diameter. 3”-4” post might be used for your terminal post and 2 3/8” would serve as the line post. 1 5/8 top rail would be used.
  2. The gauge of the fence fabric will be thicker usally a 11ga or 9ga would be used
  3. Barb Arms can be added to support barb and/or razor wire along the top of your fence.


Installing Barb Arms


Barb Arms

Your corner, ends, and gate post all need to be set 12”-18” higher then the finished height of the fence.  See fig ?  Barb Arms will be used instead of line tops.  Barb Arms come in 45 degree or in verticals.  The Barb Arms also include hole that the top rail will run through.

Chain-Link

What makes Wood Fence a sustainable building option?

admin · November 2, 2012 ·

While wood has long been celebrated for its durability, beauty and value as a building material, a new belief is emerging, that alleges any alternative to wood is environmentally preferable. So how does wood stack up as a green building material? The answer is, quite well actually.


Many may not realize that wood is a renewable, recyclable and biodegradable material, with numerous environmental benefits. As one of the foremost energy efficient and effective building materials, wood is the only energy self-sufficient building material while being manufactured. Wood remains the number one industrial raw material, accounting for almost half of consumption, but only accounts for less than 5 percent of the total energy used during its’ manufacture.


Comparatively, steel accounts for only 23 percent of raw material, while consuming almost 50 percent of the total energy input. While steel’s energy input comes in the form of mining and burning coal, both non-renewable, the primary energy input for wood is from solar energy. Wood is also an energy-efficient building material when used in a structure, because wood is a natural insulator, it’s 15 times more efficient than concrete and 400 times that of steel.


It also takes nine times more energy to produce a steel stud than to produce a wood stud. Five times more energy is used for aluminum siding than wood siding. Steel, both new and recycled, uses 4,000 times more coal, oil, and gas in its refining, manufacturing, and fabricating process than wood does.


Wood is also environmentally friendly. The notion of the country running out of trees is a myth and a falsehood. While it’s true that early in our country’s history the forests were looked upon as a mineable resource, it’s important to consider the facts.


The real story is that almost three billion trees are planted in America’s forestlands each

year. Our forest growth now exceeds tree removals by 37 percent. While, things weren’t always that way, the adoption of the first Tree Farm Act and in 1944 changed the American mindset. Since then, America has grown more trees each year in America than it has used for making paper, houses, books and other things used every day.


Another environmental plus for wood is its impact on the global carbon cycle. Scientists challenge that rising levels of carbon are leading to global warming. Growing wood fiber in working forests is very beneficial to the balance of carbon in the atmosphere. The growth of one pound of wood absorbs 1.4-7 pounds of carbon dioxide and releases 1.07 pounds of oxygen. The simple fact is that trees act as natural air filters, absorbing unwanted carbon dioxide gas and releasing breathable oxygen.


Economically speaking, wood is among the most sustainable materials available. Americans use wood fiber in huge quantities, with the current annual per capita use of wood products being one “standard” tree.  In the last 100 years, advances have provided our society with much more value from that same wood fiber.


Cedar specifically is thought of as one of the world’s most durable woods. Its naturally resistant to moisture, decay and insect damage make it the ideal choice for a surface that is exposed to the sun, rain, heat and cold all year long.


Our local choices truly have global consequences. Wood is the product of sunlight, earth, air and water—all natural elements. Trees grow back; strip mines, gravel pits and depicted oil wells do not. The responsible growth, harvest, processing and re-growth of wood fiber for building material is the most benign path to a sustainable future.

Wood building material, energy efficient buildings, green building material, sustainable building, wood fences, wood studs

Driveway Gates for wood fence or screening material

admin · November 1, 2012 ·

When building a driveway gate you have two basic options a sliding gate or a swinging gate.

Both are great options, and can be beneficial for a variety of reasons, but depending on the details of your particular project one may be better than the other. If you’re unsure which type of gate that you want, please read through the definitions below to decide which step to take next.

Let’s take a look at the details of each:

Swinging: A swinging gate is great for most short lengths, and is most efficient for gates 14 feet long or less. If your gate is 10 feet or less, constructing a single gate is a viable option, offering a stable frame and little drag or resistance. If your gate will be automated, using a rubber bumper or positive stop is a good idea.You shouldn’t go more than 12 feet long with a swinging gate.

If your gate’s length is 10 feet or more, constructing a double-drive gate is the best option for swinging gates extending 10 feet to 20 feet. If your fence doesn’t need automation, you could build up to a 20 foot gate. If your gate is going to be more than 20 feet long, we recommend a sliding v-track gate.

Sliding: A sliding gate is great for any length of gate, but the benefits especially show with lengths of 14 feet or longer. Fence Supply Inc. recommends using the v-track system, offering an easy-to-install, easily expandable option. It can be opened manually without a gate opener, but allows for the addition of a future gate opener. It will also stay stable in high winds. If you will be opening your gate rarely, for example a few times a month, then you don’t really need an automatic gate. But if your gate will have frequent use, or is longer than 10 feet, we recommend using an automated gate.
__________________________________________________

V-track Gate

When constructing a sliding gate for a wood fence, we recommend using a V-track gate to create a long-lasting, well-built gate that will work in almost any situation. This option uses a set of wheels and guide rollers to seamlessly glide over a stable iron track. V-track gates ensure stability and alignment, and are much more effective when compared to some of the commonly found homemade options that are constructed from 1-inch angle iron and flat plates.

To assemble and create your V-track gate, we recommend the following steps:

1. Installing your posts properly will be integral to building a solid, long-lasting gate. For a six-foot tall gate, use a 4″ x 4″ x x 10′ post.  For an eight-foot gate, use a  4″ x 4″ x x 12′ post. To determine the width at which you bury the posts, take a measurement of all your materials (the guide rollers, the steel frame, the wood, etc.) and then add ½ inch.

The ideal installation will use 5 posts:

a. 1 latch or catch post

b. 4 guide posts

The minimum recommended depth for posts to be buried is 3 feet. This depth should increase in poor soil conditions.

This post layout offers the most secure and safe installation. With four guide posts, the gate is literally caged-in, and has no chance of falling over or coming off of its track. This installation also makes it virtually impossible for the gate to by lifted or removed.

2. The foundation for your V-track gate system is vital to ensure that your gate works properly and effectively. It’s important to keep the V-track as level as possible so that the V-wheels can glide properly over the track. Fence Supply Inc. recommends installing a 12-inch wide by 6-inch thick concrete support curb as a foundation beneath your V-track, wherever it will be driven over.

If concrete is not an option for your project, here are a few alternatives:

  • I-beam with post supports
  • Asphalt. This option must be secured with 3/8 rebar. The r-bar should be driven 12 inches deep and flush with the V-track, and puddle-welded onto the V-track. This option should only be used when securing to concrete is impossible. The longevity of this option will be determined by type of vehicle traffic.

3. The V-track itself is a specialized, pre-molded solid strip of galvanized steel. The V-track is pre-drilled with holes every 12 inches.

4. Two V-wheels are necessary per gate. While additional V-wheels may seem to be beneficial, Fence Supply Inc. recommends never using more than two V-wheels, as it’s actually counterproductive and can cause alignment damage to your gate. For a six-foot gate, a four-inch Kodiak V-wheel is recommended. For an eight-foot gate, a six-inch Kodiak V-wheel is recommended.

5. Four 6-inch guide rollers should be used for the gate application. Two adjustable guide roller assemblies will also work. Attach the guide rollers to the post.

Steel frames for wood or solid surfaces

Fence Supply Inc. believes in securing a strong frame by using a 2″ x 2″ galvanized frame. This is the single most important component to the longevity of your gate system. For optimal ease in opening and closing the gate, the design is extremely important when considering automating your gate. The following illustrates the ideal gate construction:

  • Six-foot tall: This style has 3 horizontal rails, and vertical rails spaced a maximum of 8 feet on center. This ensures optimal stability and structural integrity.
  • Eight-foot tall: This style includes 4 horizontal rails, and vertical rails spaced a maximum of 8 feet on center. This ensures optimal stability and optimal integrity.
  • When constructing gates larger than 25 feet, special care needs to be taken in the design of gates. Please consult with Fence Supply Inc. for your specific needs.
  • The frame, made from 2″ x 2″ galvanized steel, will allow for years of low maintenance.

Wood automated gate, build gate, drive gates, driveway gates, gate, gate opener, gate operator, gates, gates panels, single gate, slide gates, swinging gates

Vinyl fencing in dark colors?

admin · November 1, 2012 ·

Have you ever wondered whether vinyl fencing comes in any other colors than white? It seems like that’s all you can find when you look at vinyl fence models. Does it come in any other, darker colors? The short answer is it does, but most vinyl fence manufacturers don’t offer it and with good reason.

Vinyl fencing was born from the PVC pipe industry. It has long-term durability and structural integrity because of the base ingredient, PVC (polyvinyl chloride). Yet the PVC pipe industry forgot an important factor when they made their first vinyl fencing: ultraviolet rays break down PVC. This was overlooked because PVC pipe is typically behind walls and underground.

As vinyl fencing became more popular, customers began using it in more outdoor applications. Though for this to be accomplished something needed to be added to the vinyl to allow it to hold up to UV light rays, which is how titanium dioxide was introduced to the mix. Now, titanium dioxide is a main component in inhibiting these UV rays, meaning vinyl fences now offer long-term durability, flexibility and weather-ability.

How does this affect color?

Titanium dioxide is a white pigment, making it more difficult to manufacture vinyl fencing in darker colors, but recently fencing manufacturers have found ways to achieve this. The process involves tweaking some of the manufacturing steps to produce a durable and maintenance free-fence in many different, darker colors.

This is where the bigger problem comes into play.

Vinyl expands when heated. So when continually beaten by the sun’s UV rays, it begins to look more like taffy than a fence. And dark colors only amplify the warping of the vinyl, because the darker the fence, the more heat is attracted, and the more pliable and warped it becomes.

This is why you don’t typically see vinyl in dark colors. Vinyl, even with proper components, will store the sun’s radiant energy and cause the product to be hotter than the air temperature. A dark brown vinyl fence (versus white or lighter color) in the Texas sun could wind up drooping over or even laying flat out on your lawn.

In return, many reputable fencing companies have opted not to carry darker colors as an option so they can still guarantee lifetime warranties on their vinyl fences, as they know the light-colored vinyl fencing is able to hold up long-term to all conditions, including  heat.

Something to note is these easy-to-care-for light colored vinyl fences hold up well to routine property maintenance, including most types of weed eaters. For those who have painted fences, you may quickly notice scratches and damage due to normal property maintenance. Painted fences need painting almost every year. Vinyl fences, due to the makeup of the product, really need little to no maintenance, ever.

Lastly, if you really want a dark colored vinyl fence, painting it is an option. An epoxy-based paint needs to be used on the smooth vinyl surfaces in order for proper adhering. One of the many pros to vinyl fencing is it does NOT require painting maintenance, so if you decide to paint it, you will need to know it will need to be repainted in time. Disclaimer: Painting your vinyl fence will more than likely result in loss of manufacturer’s warranty, so be sure to check before pulling out a spray gun.

Vinyl

  • « Previous Page
  • 1
  • 2
  • 3
  • Next Page »

Product categories

  • Wood
  • Iron
  • Vinyl
  • Chain Link
  • Hardware & Tools
  • Farm & Ranch
  • Gate Openers
  • Shade Structures

Learn Center

We have acquired a lot of knowledge over the years.

Drawing Center

Plan, elevation, and detail drawings to help you get

Photo Gallery

Check out these beautiful finished projects built with

Tour

Get a good look at our storefront, warehouse, and yard.

Shop

  • Wood
  • Iron
  • Vinyl
  • Chain Link


  • Gate Openers
  • Farm & Ranch
  • Shade Structures
  • Hardware & Tools

More Info

  • Privacy Policy
  • Terms and Conditions of Sale
  • Installation Services
  • Contact Us

About Us

  • Our Story
  • Our Team
  • Go Green Initiative
  • Careers

Fence Supply Inc.

435 US Highway 80 E
Sunnyvale, TX 75182


Phone: (972) 226-0004
Toll Free: (888) 201-2564
Fax: (972) 226-0777


Contact Us

About | Contact | Privacy & Terms

© 1996–2025 Fence Supply Inc. | All rights reserved.
Fence Supply Inc. - Wood, Iron, Chain-Link, PVC, Farm & Ranch Fencing, Iron Handrails, Posts, and Gates, PVC Handrails, Posts, and Gates; Gate Operators; Access Control; Kennels
Picketman™ is a trademark of Fence Supply Inc.